
Install on Wix
Add your botts.ai chat widget to every page of a Wix site with the Custom Code setting in your site dashboard, in six steps.
This guide adds the chat widget of a botts.ai website deployment to a Wix site. It uses Custom Code in your site dashboard, which adds the widget's script to every page of your site. The steps are the same whether you built the site with the Wix Editor, Wix Studio or Wix Harmony.
Don't use the editor's Embed HTML or Embed Code element for this. Wix shows that element's code inside an iframe, a box on one page, not across your whole site.
Before you start
You need:
- Access to your site's dashboard, including its Settings, for example as the site owner or as an Admin (Co-Owner).
- A Wix site plan: a Premium plan, or a Studio plan for sites built with Wix Studio. For custom code, Wix requires the site to be published and to have a connected domain, and connecting a domain requires a site plan. You also need your own domain, bought from Wix or another provider. Selected site plans include a voucher for a free domain for one year. A free site on a wixsite.com address can't use custom code, even though Wix lets you open the Custom Code form there and fill it in without any warning.
- The embed code of your website deployment. In botts.ai, open Agents, pick your agent, go to the Deploy tab and open the Website deployment. The Install section at the bottom of the editor shows the code with a copy button. No website deployment yet? See Deployments.
The embed code looks like this, with your deployment's own key in place of YOUR_API_KEY:
<script async src="https://api.botts.ai/widget/chat-widget.js?key=YOUR_API_KEY"></script>
Note
The website widget needs the Business plan or higher. The Personal plan includes the internal chat only.
Step 1: Open Settings in your site dashboard
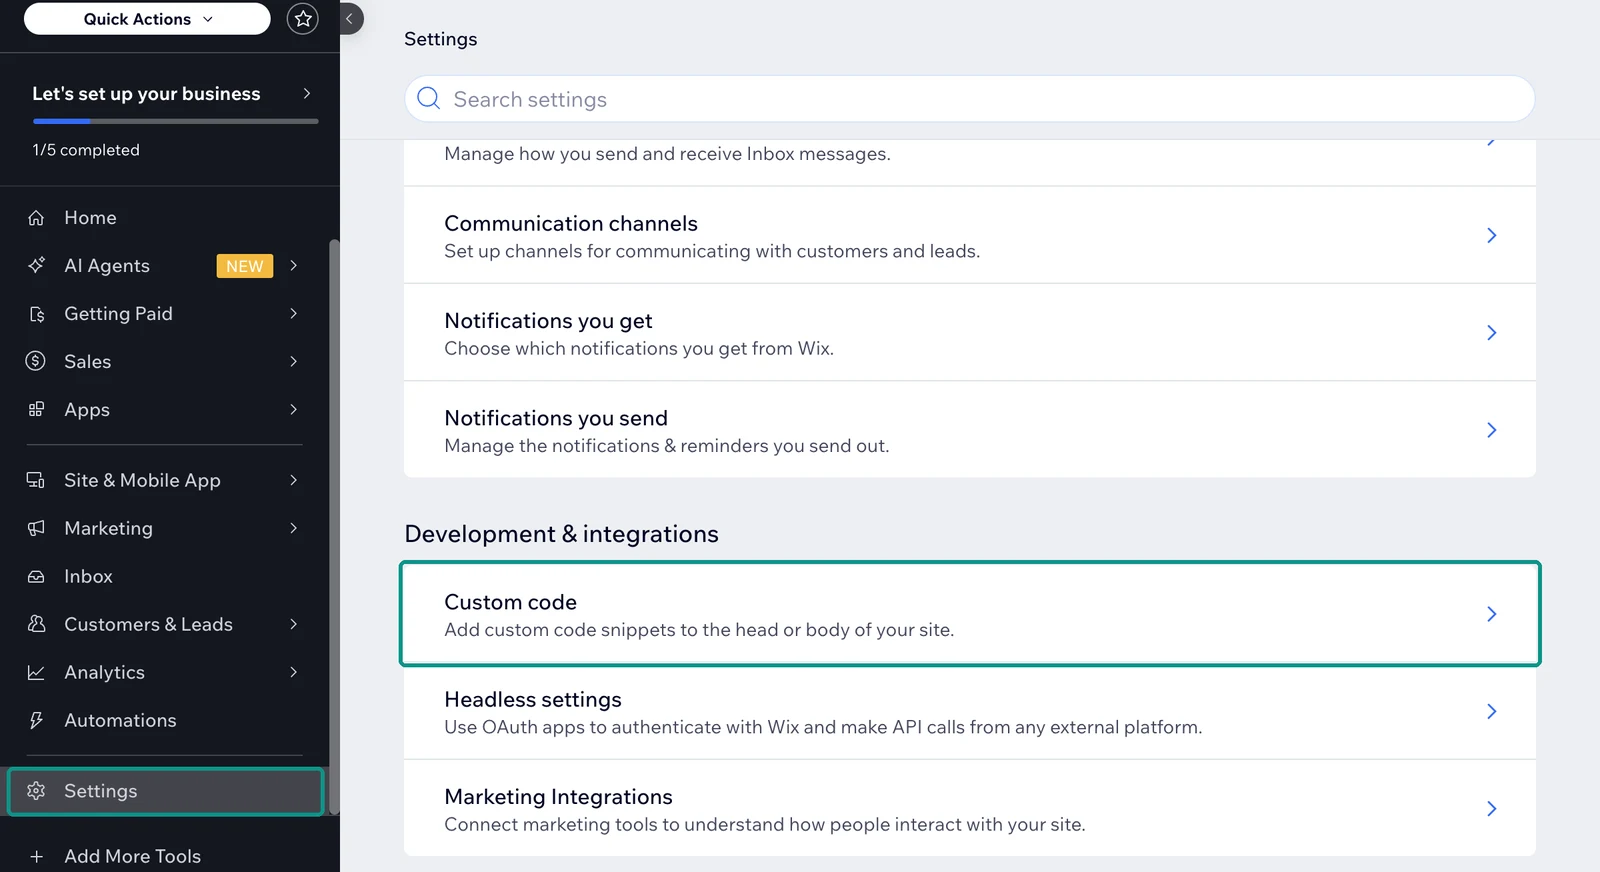
Sign in to Wix, open the dashboard of your site and click Settings near the bottom of the left sidebar. In a small window, scroll the sidebar down to see it.
Step 2: Open Custom Code
Click Custom code in the Development & integrations section.
Step 3: Paste the code
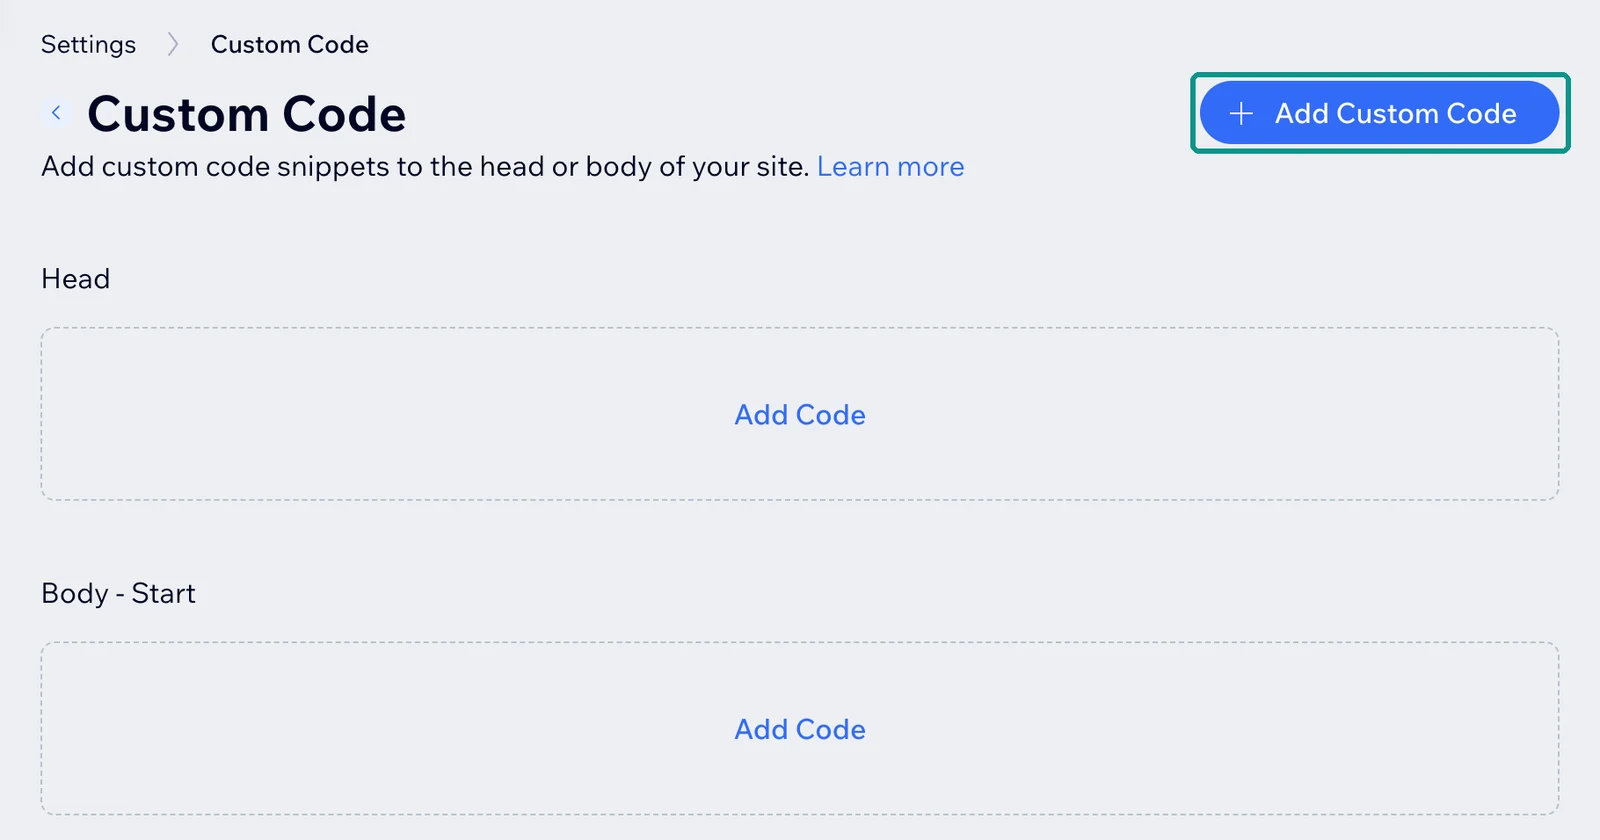
Click + Add Custom Code at the top right.
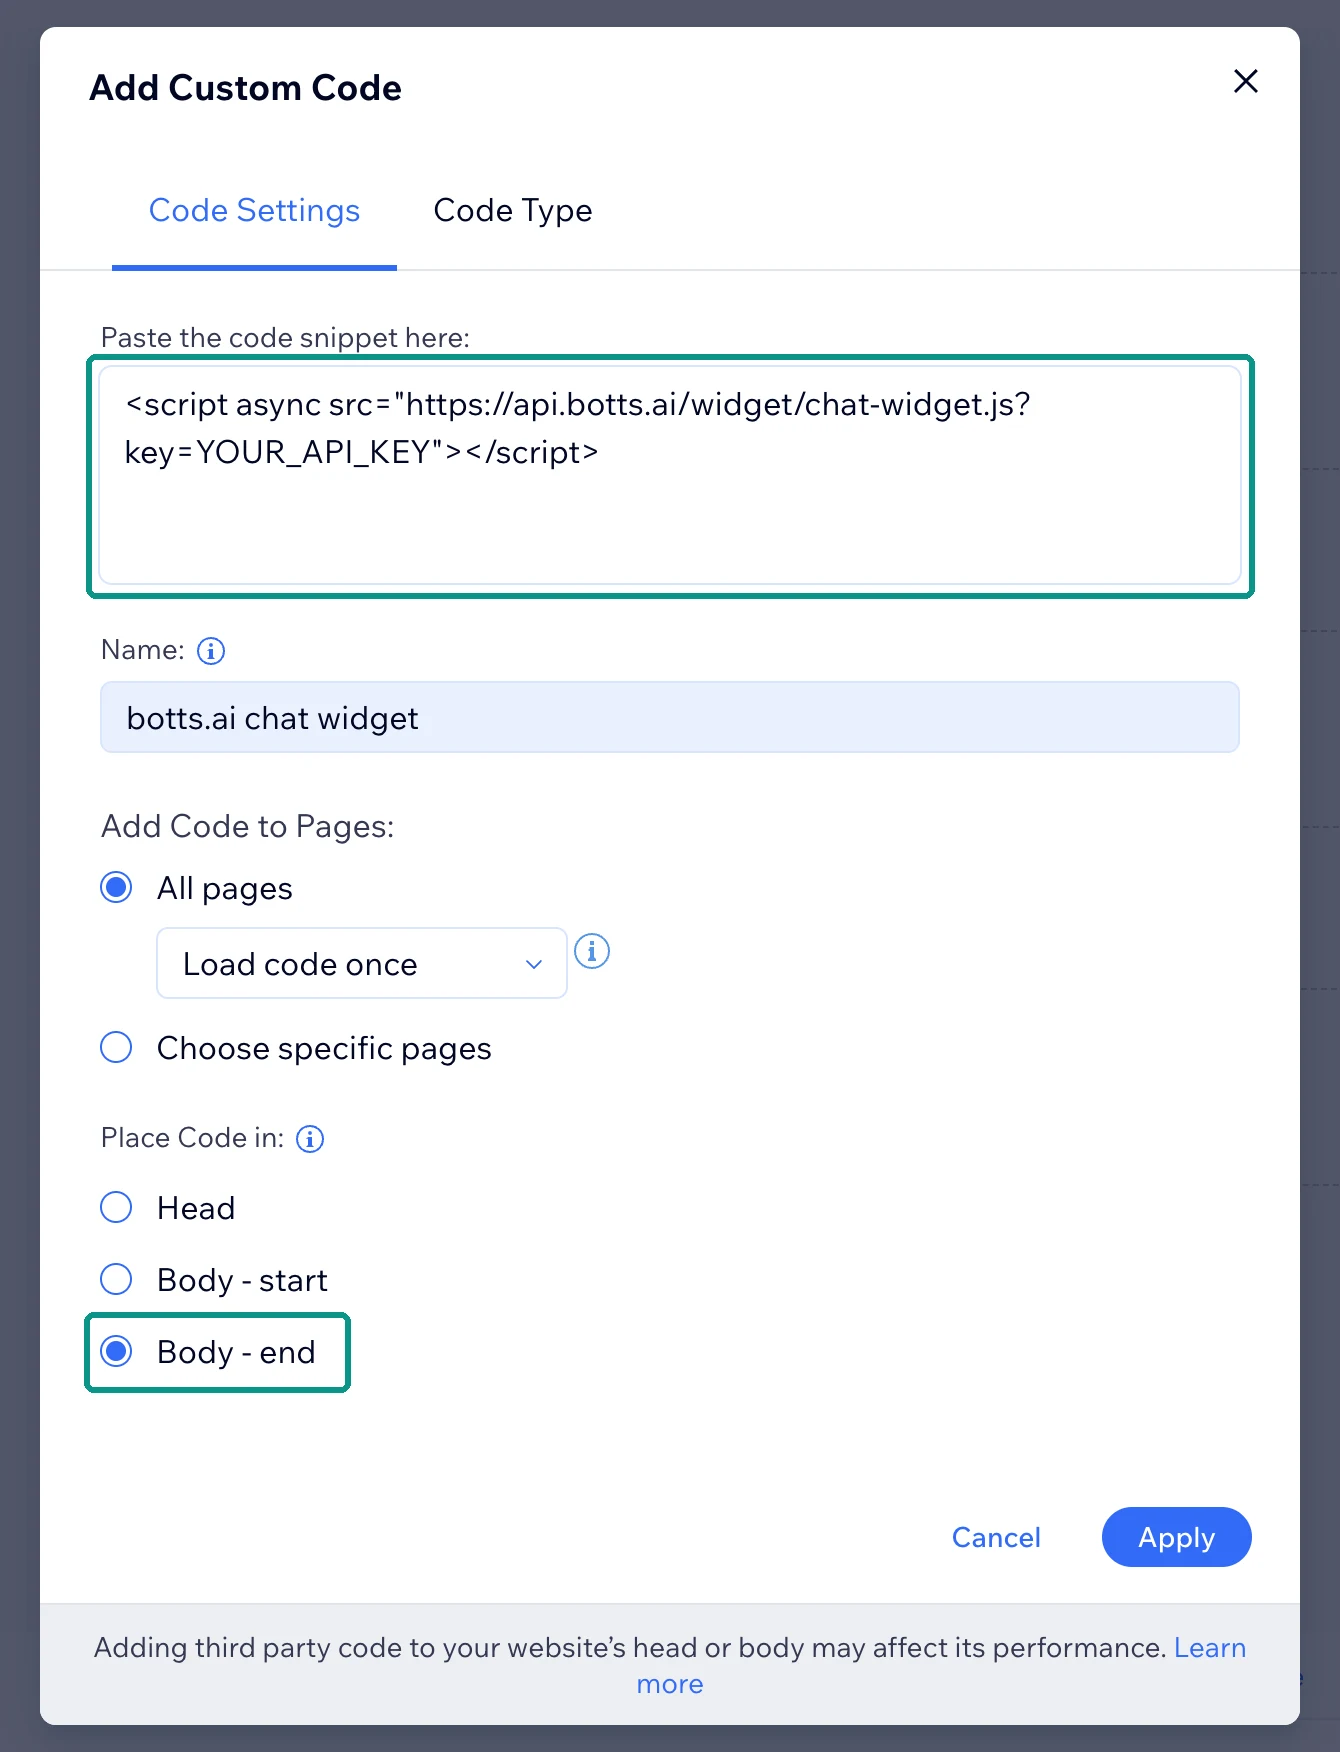
In the dialog that opens, paste your embed code into the box under Paste the code snippet here, exactly as copied: the address and the key must not change. The Name field below it starts out as Custom. Replace that with a name you will recognize later, such as botts.ai chat widget.
Step 4: Choose pages and placement
Under Add Code to Pages, keep All pages selected and Load code once in the dropdown below it. Both are the defaults. Under Place Code in, Head is selected by default: change it to Body - end.
With All pages, the widget also appears on pages you add later.
Step 5: Apply the code
Click Apply. The code now appears in your list of custom code.
Step 6: Check the widget on your site
Open your published site at your own domain in a private window, reload the page and wait a moment. Custom code doesn't run inside the Wix editor, only on the published site. The chat launcher appears in the bottom-right corner, or wherever you placed it in the widget editor. Open it and send a test question. Check a subpage and your phone as well.
Tip
It worked if the widget shows on your published site, opens, and answers your test question.
If the widget doesn't appear
- Check that your site is published and has a connected domain, and that you are looking at the site on that domain, not in the editor.
- In Settings → Custom Code, check that the botts.ai code is in the list, its toggle is on, and it is set to All pages and Body - end.
- If you assigned a different domain to your site, Wix deletes your custom code. Add the code again.
- Custom code counts as essential by default. If you changed its category under Code Type and your site shows a cookie banner, the widget only loads for visitors who accept that category.
- Test in a private window without an ad blocker.
- Check that the key belongs to the right deployment and that the deployment is switched on in the Deploy tab.
Change or remove the widget
Colors, texts, the launcher and every other widget setting are changed in the botts.ai editor. Your site picks them up without any change in Wix. The code only needs replacing if the deployment's key changes.
To remove the widget, go to Settings → Custom Code and delete the botts.ai code. To hide it for a while, switch off its toggle instead.
Note
The screenshots show the Wix dashboard in English. Menu and button names can differ with the language of your Wix account.
More help
- Wix Help Center: Embedding Custom Code on Your Site
- The general steps for any website: Embed code
Last updated on October 4, 2026