
Install on Webflow
Add your botts.ai chat widget to a Webflow site with the site-wide custom code in Site settings, in six steps and without touching your design.
This guide adds the chat widget of a botts.ai website deployment to a Webflow site. It uses the Footer code field in Webflow's Site settings, which adds the widget's script to every page of your site in one go. Your design in the Designer stays as it is.
Before you start
You need:
- Access to your site in Webflow as the Workspace owner or admin, or with the Site manager or Designer role. Only these roles can edit a site's custom code. You also need permission to publish the site.
- A Webflow plan that includes custom code: a paid Site plan (Basic or higher) for your site. A paid Core, Growth, Freelancer or Agency Workspace plan also unlocks custom code, but only on the webflow.io staging address. To show the widget on your own domain you need a paid Site plan anyway, since only sites with a Site plan can be published to a custom domain. If both your site and your Workspace are on the free Starter plan, custom code isn't available.
- The embed code of your website deployment. In botts.ai, open Agents, pick your agent, go to the Deploy tab and open the Website deployment. The Install section at the bottom of the editor shows the code with a copy button. No website deployment yet? See Deployments.
The embed code looks like this, with your deployment's own key in place of YOUR_API_KEY:
<script async src="https://api.botts.ai/widget/chat-widget.js?key=YOUR_API_KEY"></script>
Note
The website widget needs the Business plan or higher. The Personal plan includes the internal chat only.
Step 1: Open Site settings
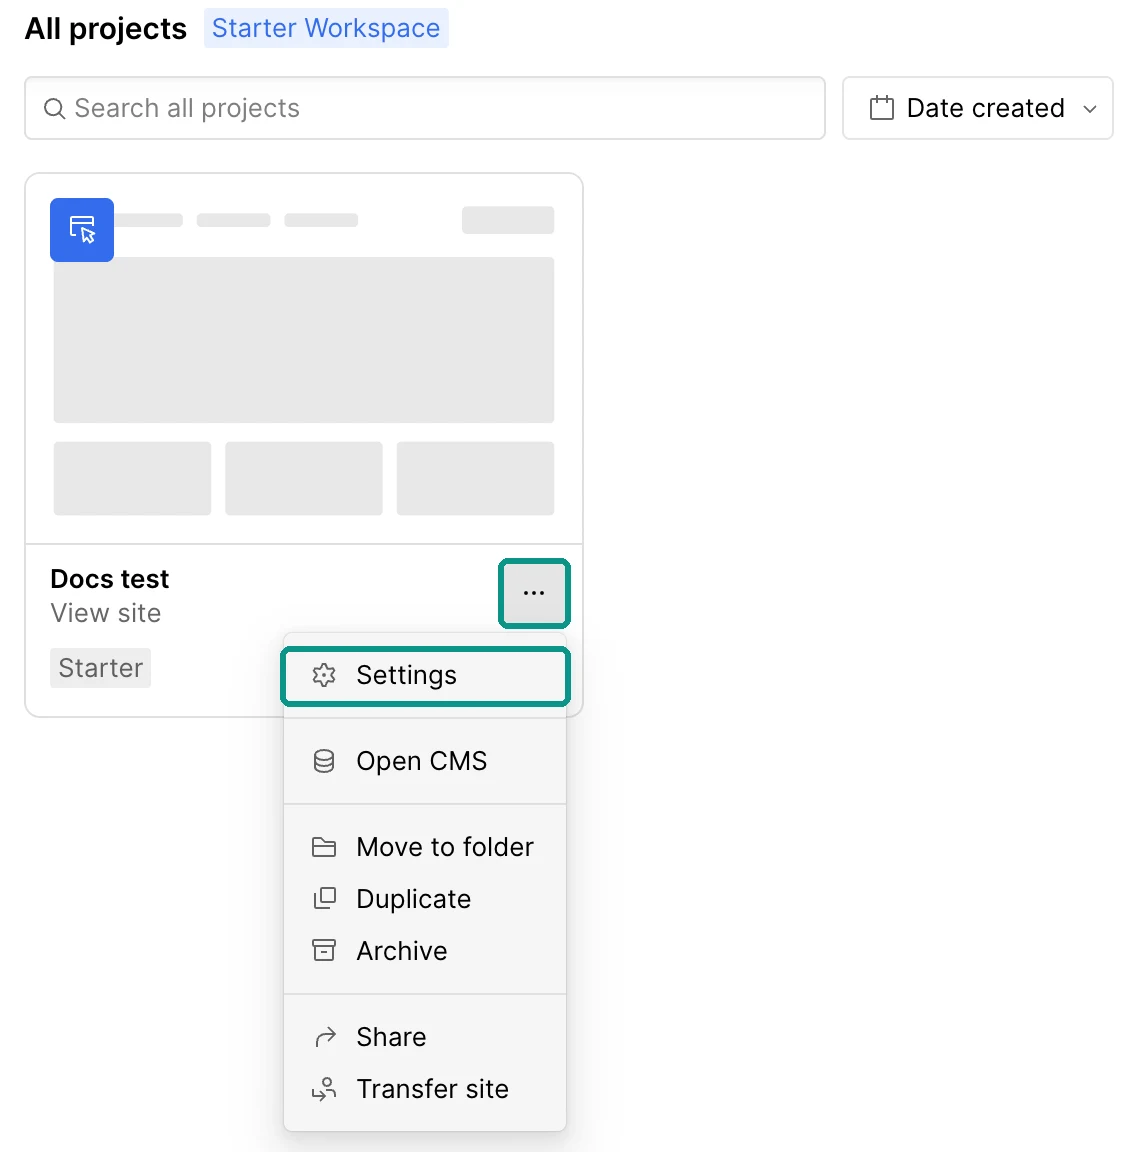
Sign in to Webflow. In your Dashboard, click the more options button (three dots) next to your site's name, below its thumbnail, and choose Settings. This opens the Site settings of that site.
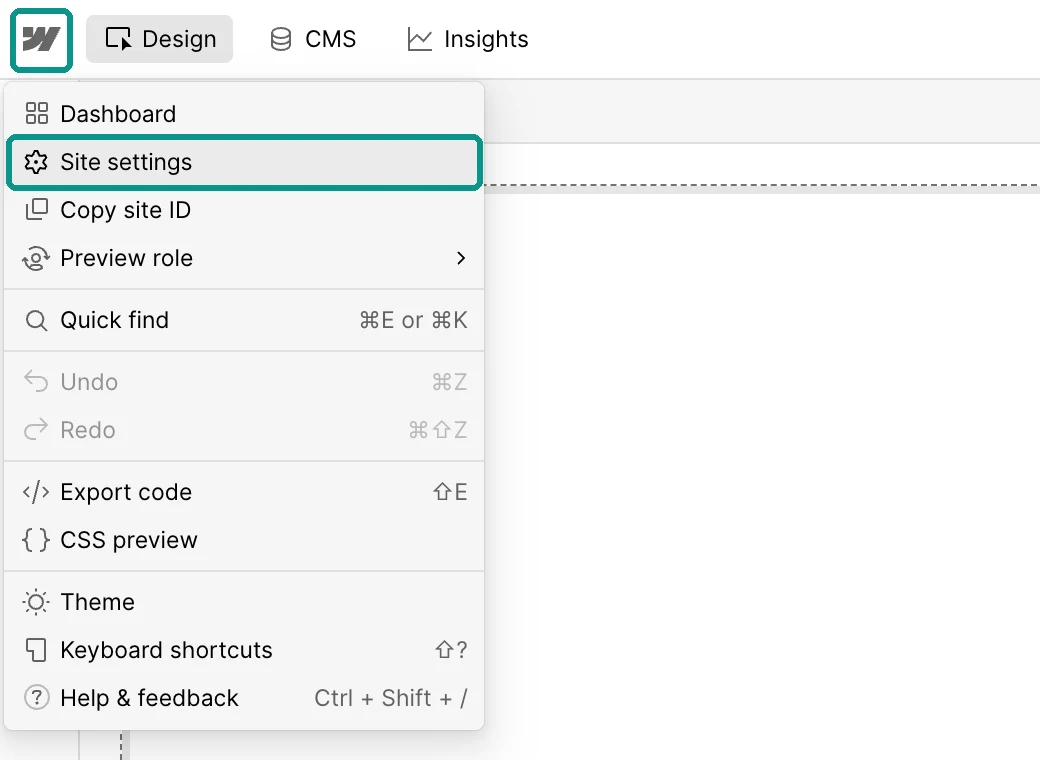
If the site is already open in the Designer, click the Webflow logo in the top left and choose Site settings.
Step 2: Open Custom code
In the menu on the left of Site settings, click Custom code. Below the Run custom code in Preview setting, the Custom Code section has two fields for code that applies to your entire site: Head code and Footer code.
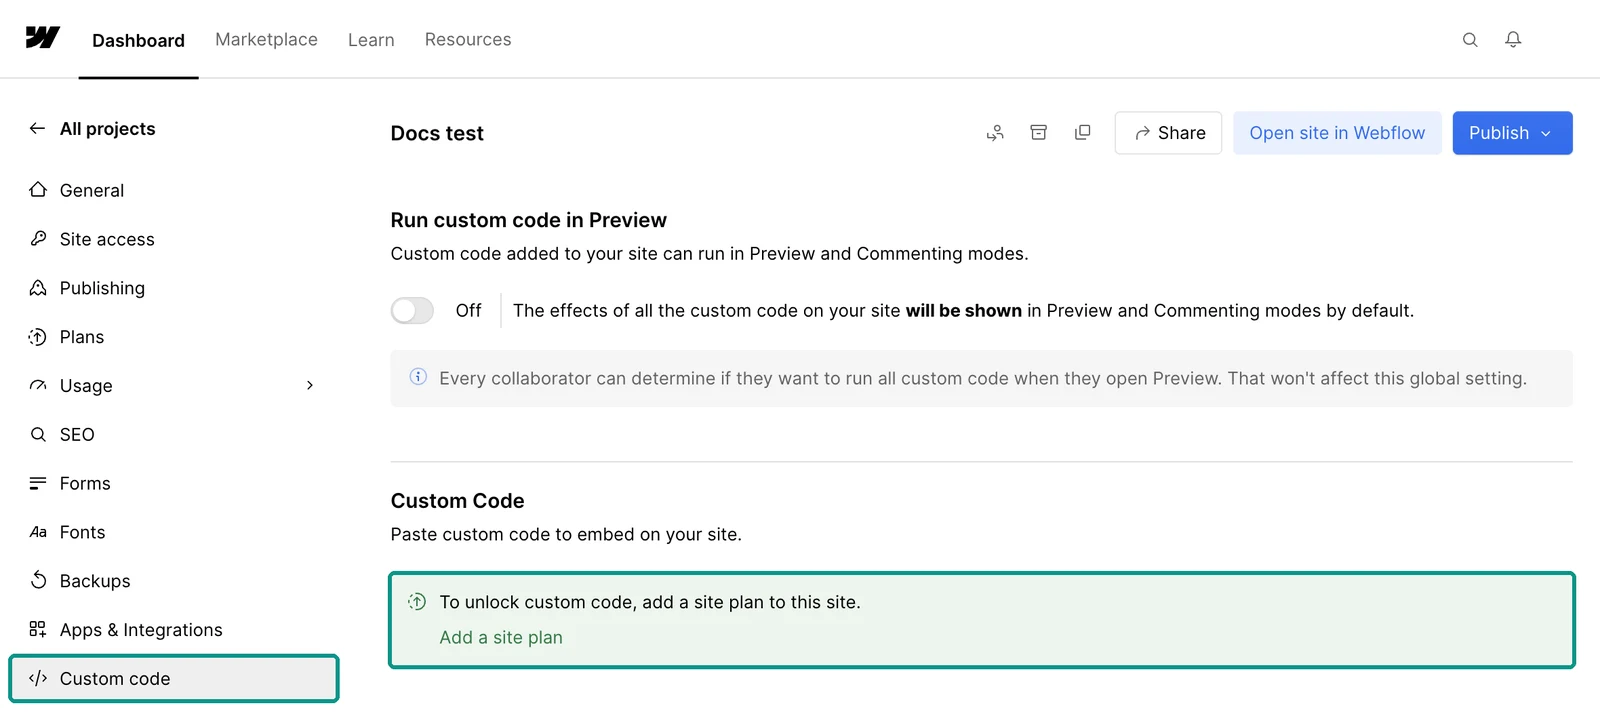
The screenshot shows a site without a Site plan: instead of the two fields, its Custom Code section only has the notice "To unlock custom code, add a site plan to this site." If you see this notice, your site needs a paid Site plan first (see Before you start).
Step 3: Paste the code into Footer code
Paste your embed code into the Footer code field. If the field already holds code, put the botts.ai code on a new line below it and leave the rest as it is. Paste the code exactly as copied: the address and the key must not change.
Webflow adds the Footer code just before the closing </body> tag on every page, which is where the widget script belongs.
Step 4: Save your changes
Click Save changes. The code is now stored in your site, but it isn't live yet.
Step 5: Publish your site
Webflow only puts custom code on your live site when you publish. Click Publish, tick the domain your visitors use (your own domain, and the webflow.io address if you want the widget there too), then click Publish to selected domains.
Step 6: Check the widget on your site
Open your published site in a private window, reload the page and wait a moment. The chat launcher appears in the bottom-right corner, or wherever you placed it in the widget editor. Open it and send a test question. Check a subpage and your phone as well.
Tip
It worked if the widget shows on your published site, opens, and answers your test question.
If the widget doesn't appear
- Check that you published after saving, and to the right domain. If you only ticked the webflow.io address, your own domain still shows the version without the widget.
- Check that the complete code is in the Footer code field of Site settings → Custom code and that you clicked Save changes.
- Test your published site, not the Webflow Designer.
- Check your plan. Without a paid Site plan or a paid Workspace plan, Webflow doesn't let you add the code: Custom code then shows "To unlock custom code, add a site plan to this site." instead of the two fields.
- Test in a private window without an ad blocker. If your cookie banner or consent tool blocks scripts, check its configuration.
- Check that the key belongs to the right deployment and that the deployment is switched on in the Deploy tab.
Change or remove the widget
Colors, texts, the launcher and every other widget setting are changed in the botts.ai editor. Your site picks them up without any change in Webflow and without publishing again. The code only needs replacing if the deployment's key changes.
To remove the widget, delete only the botts.ai script line from the Footer code field, click Save changes and publish your site again.
Note
The screenshots show Webflow in English. Menu and button names can differ slightly as Webflow updates its interface.
More help
- Webflow Help Center: Custom code in head and body tags
- Webflow Help Center: How do I publish or unpublish a Webflow site?
- The general steps for any website: Embed code
Last updated on October 4, 2026